жңҖеҫҢжӣҙж–°: 2023-11-13
зӣ®йҢ„
- Download
- Installation
- Access VM
- дәӢеүҚжә–еӮҷ
д»Ӣзҙ№
- е®ғжңү VGA еҸҠ Serial port console
- Console жҳҜжІ’жңү login Password зҡ„ (зӣҙе…Ҙ), еҚідҪҝиЁӯе®ҡдәҶ root pw
- Default 第дёҖеҖӢ NIC (eth0) жңғиў«з¶ҒеҲ° br-lan
- HDD еҸҠ NIC йғҪж”ҜжҢҒ virtio
Version
- openwrt-21.02 -> Linux 5.4
Download
# i.e. $VERSION=22.03.6
https://downloads.openwrt.org/$releases/VERSION/targets/x86/
x86 Targets
-
"64" is for modern PC hardware
(https://downloads.openwrt.org/releases/22.03.6/targets/x86/64/) -
"Generic" is for 32-bit-only hardware
(https://downloads.openwrt.org/releases/22.03.6/targets/x86/generic/)
Disk images
- ext4-combined.img.gz
ext4 partition
* allows to enlarge the partition
еҸҰеӨ–жңү Package
ext4-combined-rootfs.img.gz # Only rootfs (no generic-kernel.bin)
ext4-combined-efi.img.gz # EFI boot
- squashfs-combined.img.gz (8.9M)
This disk image uses the traditional OpenWrt layout (squashfs(RO) + partition(RW))
* only 230 MB of space to store additional packages
* Failsafe Mode or Factory Reset
Partition layout
- /dev/sda1 is a 16MB ext4 /boot partition
-
/dev/sda2 is a 256MB partition containing the squashfs root filesystem and a read-write f2fs filesystem
(Any additional space in the device is unallocated.)
More Info.
blkid /dev/vda2
/dev/vda2: TYPE="squashfs" PARTUUID="c58d873d-02"
losetup
NAME       SIZELIMIT  OFFSET AUTOCLEAR RO BACK-FILE DIO LOG-SEC
/dev/loop0         0 4128768         1  0 /vda2       0     512
- rootfs.tar.gz
LXC дҪҝз”Ё
Example
VERSION=22.03.6
IMG=openwrt-$VERSION-x86-generic-generic-ext4-combined.img.gz
URL=https://downloads.openwrt.org/releases/$VERSION/targets/x86/generic
wget $URL/$IMG
Installation
жә–еӮҷ qcow2 format зҡ„ image
gzip -dk openwrt-*.img.gz
qemu-img convert -f raw -O qcow2 openwrt-*.img openwrt.qcow2
е»әз«Ӣ internal зҡ„ bridge
# ж–№жЎҲ 1 - By OS
/etc/network/interfaces
#### Bridge for Internal
auto openwrt_br0
iface openwrt_br0 inet manual
    bridge_stp off
    bridge_fd 0
ifup openwrt_sw
# ж–№жЎҲ 2 - By virsh
openwrt-br0.xml
<network>
  <name>openwrt-br0</name>
  <bridge name='openwrt-br0' stp='off' delay='0'/>
</network>
virsh net-define openwrt-br0.xml
virsh net-start openwrt-br0
virsh net-autostart openwrt-br0
virsh net-list
 Name           State    Autostart   Persistent
-------------------------------------------------
 openwrt-br0    active   yes         yes
ip link show openwrt-br0
34: openwrt-br0: <NO-CARRIER,BROADCAST,MULTICAST,UP> mtu 1500 qdisc noqueue state DOWN mode DEFAULT group default qlen 1000
    link/ether 52:54:00:9b:1b:b4 brd ff:ff:ff:ff:ff:ff
Notes: 當жңӘжңү VM еңЁжӯӨ bridge start жҷӮе®ғзӢҖж…ӢжҳҜ DOWN зҡ„
е»әз«Ӣ VM
virsh define openwrt.xml
VM зҡ„ XML
<domain type='kvm'>
  <name>openwrt</name>
  <memory unit='KiB'>128000</memory>
  <os>
    <type arch='x86_64'>hvm</type>
  </os>

  # Tuning
  <clock offset='localtime'>
    <timer name='hpet' present='no'/>
  </clock>
  <cpu mode='host-model' check='partial'>
    <feature policy='disable' name='svm'/>
  </cpu>

  # For "Power down" Not "System halted"
  <features>
    <acpi/>
  </features>

  # VM Device
  <devices>

    # Disk
    <emulator>/usr/bin/kvm</emulator>
    <disk type='file' device='disk'>
      <driver name='qemu' type='qcow2'/>
      <source file='/mnt/raid/openwrt/openwrt.qcow2'/>
      <target dev='vda' bus='virtio'/>
    </disk>

    # NIC 1 - WAN
    <interface type='bridge'>
      <source bridge='vmbr1'/>
      <target dev='openwrt-wan'/>
      <model type='virtio'/>
    </interface>

    # NIC 2 - LAN
    <interface type='bridge'>
      <source bridge='openwrt-br0'/>
      <target dev='openwrt-lan'/>
      <model type='virtio'/>
    </interface>

    # Console
    <console type='pty'/>
    # VNC
    <graphics type='vnc' port='5910' autoport='no' listen='192.168.88.150'/>

  </devices>
</domain>
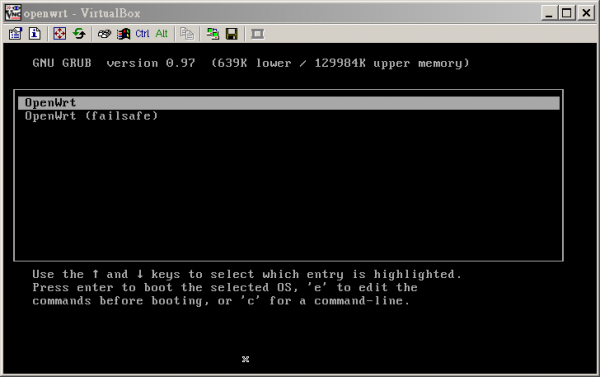
Access VM
Serial port: 38400 8N1
дәӢеүҚжә–еӮҷ
1) Login in console
2) Stop DHCP
/etc/init.d/dnsmasq stop
3) дҝ®ж”№ NIC settings
/etc/config/network
config device
        option name 'br-lan'
        option type 'bridge'
        list ports 'eth1'

config interface 'lan'
        ...
        #option ip6assign '60'

config interface 'wan'
        option device  'eth0'
        #option proto  'dhcp'
        option proto   'static'
        option ipaddr  '192.168.11.15'
        option netmask '255.255.255.0'
        option gateway '192.168.11.1'
        option ipv6    '0'
/etc/init.d/network restart
eth0 дҝӮ LAN зҡ„еҺҹеӣ
uci show | grep ^network
...
network.@device[0]=device
network.@device[0].name='br-lan'
network.@device[0].type='bridge'
network.@device[0].ports='eth0'
4) иЁӯе®ҡ web panel
/etc/config/uhttpd
# еҸӘдҝқз•ҷ https зҡ„ 8443
config uhttpd 'main'
        #list listen_http '0.0.0.0:80'
        list listen_https '0.0.0.0:8443'
/etc/init.d/uhttpd restart
5) дҝ®ж”№ firewall settings
/etc/config/firewall
config rule
        option name             Allow-FW-Panel
        option src              wan
        option dest_port        8443
        option proto            tcp
        option target           ACCEPT
6) Turning
(a) Disable IPv6
Network > Interfaces > Edit > Advanced Settins > "IPv6 assignment length" йҒё "disabled"
7) Upgrade Panel
opkg update
# -V[<level>] Set verbosity level to <level>
opkg -V upgrade luci
8) е®үиЈқеёёз”Ё Package
opkg install curl rsync tcpdump diffutils
Other