жЬАеЊМжЫіжЦ∞: 2024-02-10
зЫЃйМД
- Windown GUI
- еД≤жФЊ config зЪДдљНзљЃ
- Install window NIC driver
- Set IP on Windows
- Set NIC(tap name) on Windows
Windown GUI
Version:
openvpn-gui-1.0.3
Auto Start
Step0: 檐詶 CLI еЕИ
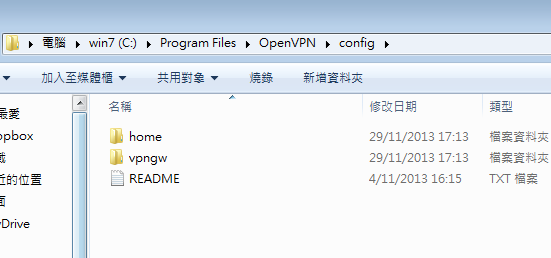
* .ovpn files can be found in the 'C:\Program Files\OpenVPN\config' folder
"%ProgramFiles%\OpenVPN\bin\openvpn-gui.exe" --connect xxxxx.ovpn
* Windows 7 and 8, OpenVPN-GUI must be run as administrator in order for the VPN to properly function.
(Disable the UAC / set the program to always run as administrator)
жЦєж≥Х 1:
START -> RUN -> regedit.exe
еОїдї•дЄЛзЪД key
HKEY_CURRENT_USER\Software\Microsoft\Windows\CurrentVersion\Run
жЦ∞еҐЮ "S" (REG_SZ)
name: OpenVPN
value: "%ProgramFiles%\OpenVPN\bin\openvpn-gui.exe" --connect home.ovpn
жЦєж≥Х 2:
зФ® StartupCPL2.8
* For Windows Vista and Windows 7 and 8, OpenVPN-GUI must be run as administrator in order for the VPN to properly function.
(avoid these conflicts is to disable the UAC)
(always run as administrator in the properties of the application)
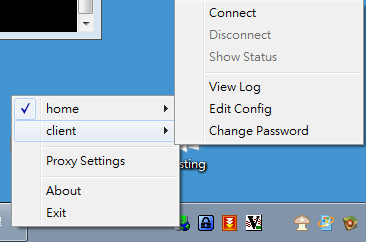
жЬЙзФ® Opts
- --silent_connection # 1=Do not show the status dialog while connecting / non-critical warnings at startup
- --append_string # 1=Append to log file. 0=Truncate logfile
- --show_balloon # 0=Never; 1=At initial connect; 2=At every (йА£жО•жИРеКЯжЩВжЬГ show иЗ™еЈ±жЛњеИ∞зЪД IP)
- --allow_edit # 1=Show "Edit Config" menu (еП≥ click еП≥дЄЛиІТзЪД Icon ж≤ТжЬЙ "Edit Config")
My Example
Windows shortcut
openvpn-gui.exe --connect xxxxx.ovpn --silent_connection 1 --append_string 0 --show_balloon 0 --allow_edit 0
Show OVPN interface
C:\Program Files\OpenVPN\bin>openvpn.exe --show-adapters
Available TAP-WIN32 adapters [name, GUID]:
'openvpn' {E8C50CC2-FB3E-4E89-BF66-699BFB7083CE}
Remark
openvpn дњВиЗ™еЈ±жФєзЪДеРН
Auto connect on Logon
Run -> taskschd.msc
"Actions" -> "Create Basic Task…"
"C:\Program Files\OpenVPN\bin\openvpn-gui.exe" --connect myprofile.ovpn
Setting:
- "When I log on"
- "Run with highest privileges"
дєЛеЊМдЇЇжЙЛ run дЄА搰檐詶
еД≤жФЊ config зЪДдљНзљЃ
-
HKEY_CURRENT_USER\Software\OpenVPN-GUI\configs
- зФ± OpenVPN-GUI жПРдЊЫ -
%userprofile%\OpenVPN\config
- зХґж≤ТжЬЙи®≠еЃЪ log жЩВ, жЬГ log еИ∞ %userprofile%\OpenVPN\log\FILE.log - C:\Program Files\OpenVPN\config
Install window NIC driver
еЯЈи°М
C:\Program Files\OpenVPN\bin\addtap.bat
# и°МдЄАжђ°, е§ЪдЄАеЉµ NIC
# еЃГеАСеПѓдї•еЬ®"з°ђдїґзЃ°зРЖеУ°и¶ЛеИ∞"TAP-Win32 Provider V9
addtap.bat:
rem Add a new TAP virtual ethernet adapter
"C:\Program Files\OpenVPN\bin\tapinstall.exe" install "C:\Program Files\OpenVPN\driver\OemWin2k.inf" tap0901
pause
Folder еРНдЄ¶дЄНйЗНи¶Б, йЗНи¶БзЪДжШѓ folder еЕІзЪДи®≠еЃЪж™Фж°ИеРН !!
Set IP on Windows
ip-win32 method
еЬ® Windows client дљњзФ® --ifconfig и®≠еЃЪ TAP-Win32 adapter IP жЩВжЙАзФ®еИ∞зЪД "method"
OVPN жЬГдї• method еОїи®≠еЃЪ IP
method:
- dynamic (Default) - By replying to DHCP query messages generated by the kernel.
- netsh - By Windows command-line "netsh"
- ipapi - By IP helper API
i.e.
1) дљњзФ®дЇЖ default зЪД dynamic еОїи®≠еЃЪ IP
ifconfig 192.168.123.200 255.255.255.0
2) зХґ Server subnet жЬЙ DHCP Server жЩВ, жЬГеЗЇзПЊйЫЩ IP жГЕж≥Б
ip-win32 netsh
ifconfig 192.168.123.200 255.255.255.0
* дљњзФ® "--ip-win32 netsh" еЊМе∞±ењЕй†ИдљњзФ® "--ifconfig"
Set NIC(tap name) on Windows
--dev-node node
Explicitly set the device node
# жЯ•зЬЛ NIC зЪД GUID
openvpn.exe --show-adapters
OVPN' {x-x-x-x-x} tap-windows6
.ovpn Settings
dev-node {x-x-x-x-x}
dev-type tap
* If OpenVPN cannot figure out whether node is a TUN or TAP device based on the name,
you should also specify --dev-type tun or --dev-type tap.
Notes
dev-type tap / tun
- tun = OSI Layer 3
- tap = OSI Layer 2
Use this option only if the TUN/TAP device used with --dev does not begin with tun or tap.
* You must use either tun devices on both ends of the connection or tap devices on both ends.
(You cannot mix them)
dev tunX | tapX | null
TUN/TAP virtual network device ( X can be omitted for a dynamic device )